
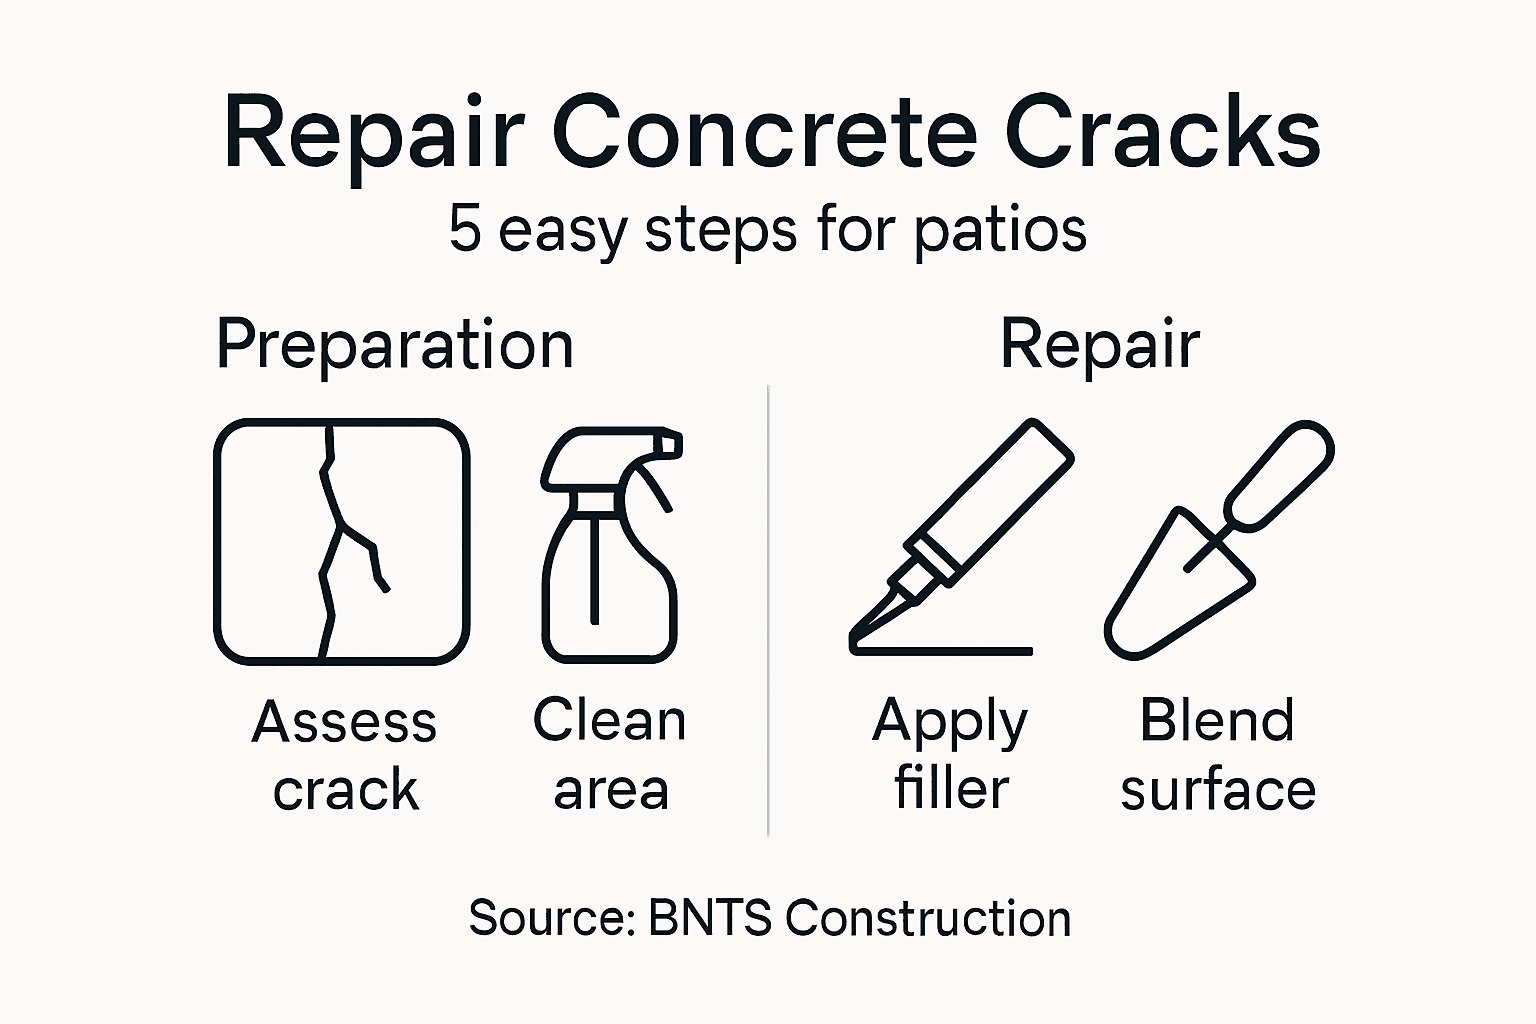
How to Repair Concrete Cracks in Decorative Patios Easily
- tbsinfotech5
- Feb 4
- 7 min read
Cracks snaking across a decorative patio can leave any Northern Virginia homeowner frustrated and worried about both the look and longevity of their outdoor space. Ignoring even small cracks often leads to bigger headaches down the line, so knowing how to handle repairs yourself feels empowering. With a focus on thorough assessment and cleaning before touching any repair material, you can protect your investment while restoring your patio’s original charm.
Table of Contents
Quick Summary
Key Insight | Explanation |
1. Clean Thoroughly Before Repair | Proper cleaning ensures strong adhesion of the filler, preventing future repair failures. |
2. Shape the Crack for Repair | Modifying the crack to a V-shape improves bonding and strengthens the patch. |
3. Choose the Right Filler | Always select a filler that matches the crack size and decorative finish of the concrete to avoid mismatches. |
4. Focus on Surface Blending | Achieve visual uniformity by carefully matching the texture of the surrounding concrete during the smoothing process. |
5. Maintain Regularly for Longevity | Conduct quarterly inspections and maintenance to extend the life of your repair and prevent new issues from arising. |
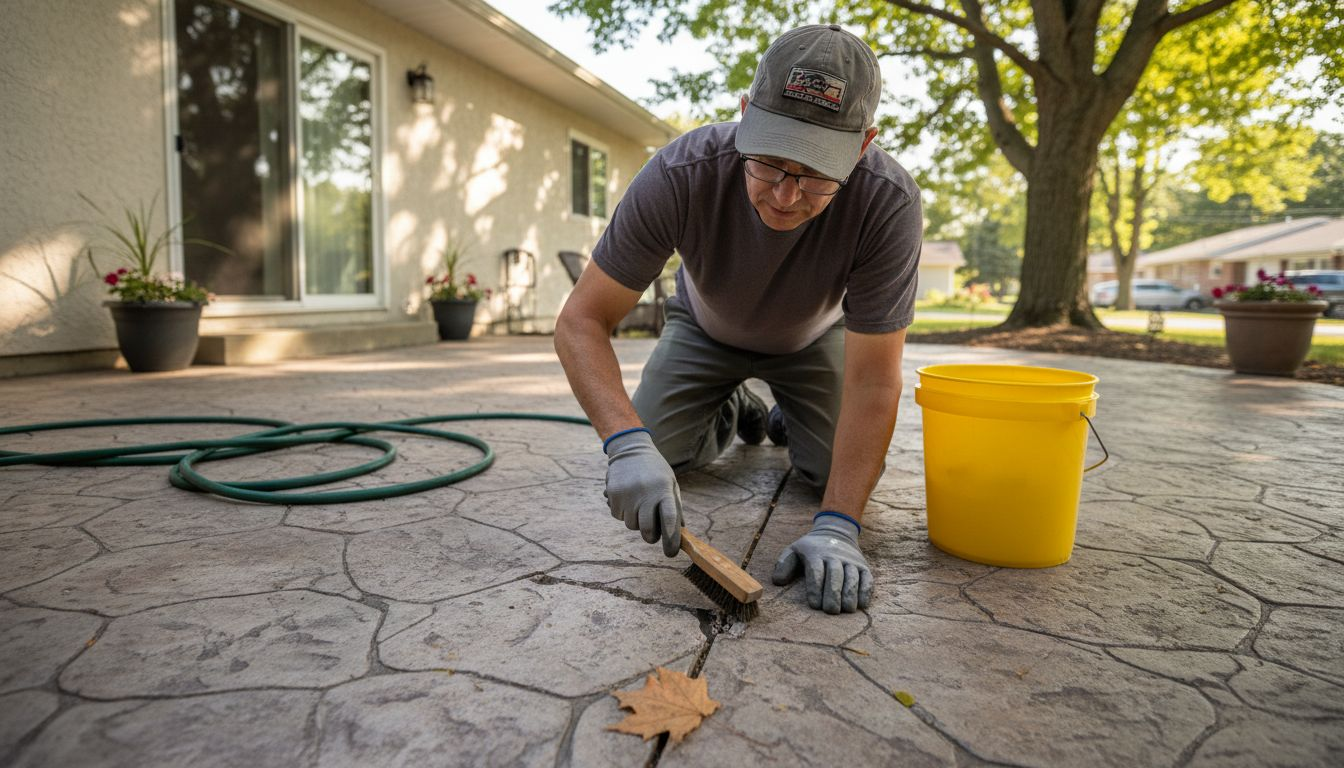
Step 1: Assess and Clean the Cracked Area
Before diving into concrete crack repairs, you’ll need to thoroughly assess and prepare the damaged area. This crucial first step ensures your repair work will be effective and long-lasting.
Start by visually inspecting the crack’s characteristics using comprehensive concrete surface assessment guidelines. Look closely at the crack’s width, depth, and direction. You’re seeking key details that will inform your repair strategy.
To prepare the area, follow these critical cleaning steps:
Remove loose debris using a wire brush or stiff-bristled broom
Eliminate dust and small particles with compressed air or a shop vacuum
Clean surface contaminants by scrubbing with a mild detergent solution
Rinse thoroughly using low-pressure water to avoid further surface damage
Precision matters during this stage. Jointing and crack control practices emphasize that proper surface preparation directly impacts repair durability and appearance.
Once cleaned, allow the concrete surface to dry completely before proceeding with repairs. This ensures maximum adhesion for your repair materials.
Pro tip: Invest in a high-quality wire brush with stiff, rust-resistant bristles to effectively clean concrete cracks without causing additional surface damage.
Step 2: Prepare the Crack for Repair
Now that you’ve cleaned the crack, it’s time to prepare it for a professional-grade repair. This critical stage ensures your concrete patch will bond effectively and look seamless on your decorative patio.
Your first task is to modify the crack’s geometry to create an optimal repair environment. Professional concrete technicians recommend transforming the crack into a V-shaped or reservoir-like profile that allows better material adhesion and structural integrity.
Here are the key steps for precise crack preparation:
Widen the crack base using a masonry chisel or saw, creating a slight V-shape
Remove any crumbling concrete around the crack’s edges
Check crack depth to determine appropriate repair material
Ensure clean, square edges for maximum bonding potential
Proper preparation is essential for creating a durable concrete repair that maintains your patio’s original decorative appearance.
Concrete surface preparation guidelines emphasize the importance of avoiding excessive damage while creating an ideal repair surface. Work carefully to preserve your patio’s aesthetic appeal during this process.
Once you’ve reshaped and cleaned the crack, you’ll be ready for the next critical repair phase. Take your time and focus on precision.
Pro tip: Use a pneumatic chisel with a narrow tip to create a precise V-groove without causing unnecessary surrounding concrete damage.
Step 3: Apply the Concrete Crack Filler
With your crack carefully prepared, you’re now ready to fill and restore your decorative patio’s surface. The goal is to create a seamless repair that blends perfectly with the surrounding concrete.
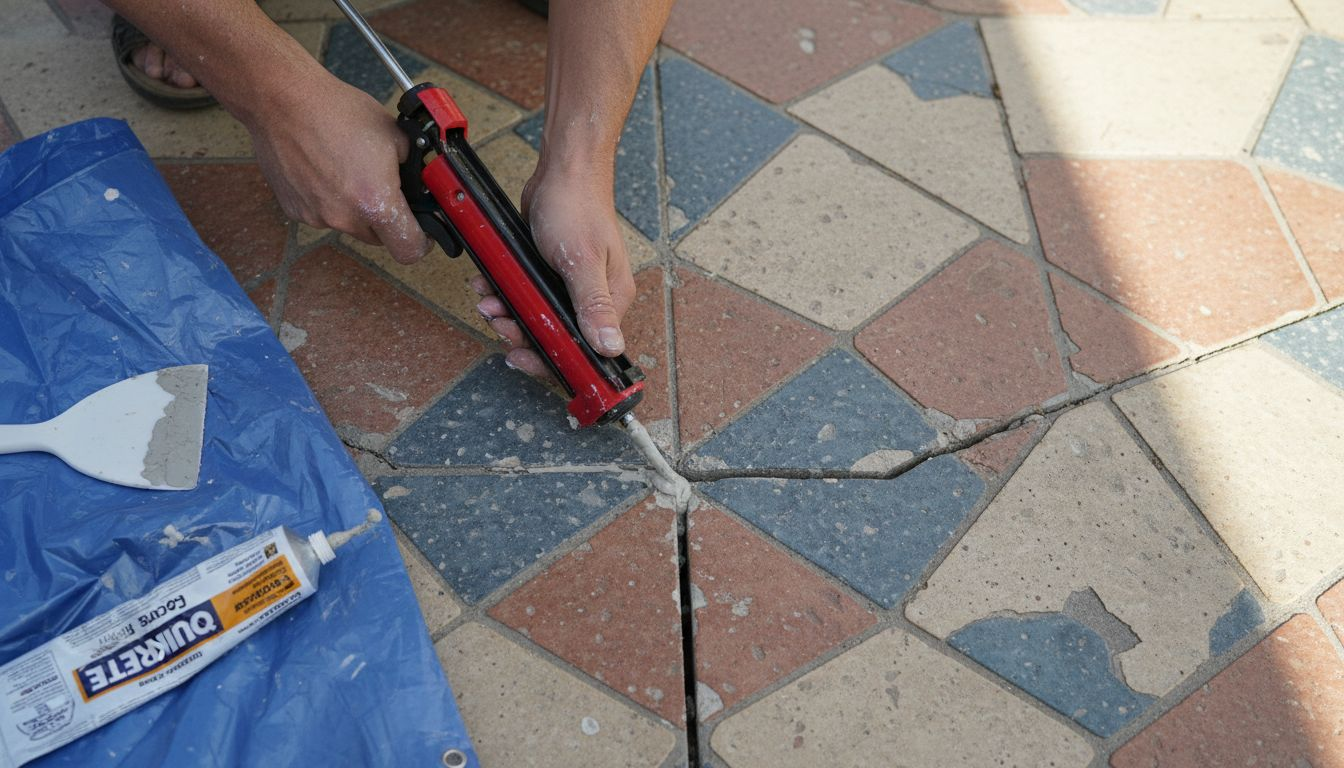
Concrete crack repair techniques require precise application to ensure maximum structural integrity. You’ll want to choose a repair material that matches your specific crack characteristics and patio’s decorative finish.
Here are the key steps for applying concrete crack filler:
Select the right filler based on crack width and depth
Mix the repair material according to manufacturer instructions
Apply filler slowly and systematically using a pointing trowel
Overfill slightly to account for potential settling
Smooth the surface with a flexible putty knife
Proper filler application is critical for creating a durable, visually appealing concrete repair.
Concrete repair methods emphasize the importance of deep penetration and thorough coverage. Work carefully to ensure the filler bonds completely with the existing concrete substrate.
Allow the repair material to cure fully before adding any additional treatments or sealants. Patience during this stage ensures a professional-looking result.
Pro tip: Work in moderate temperature conditions and avoid applying filler during extreme heat or cold to prevent premature drying or improper bonding.
Step 4: Smooth and Blend the Surface
With the concrete crack filled, your next mission is creating a seamless finish that looks like no repair ever happened. This critical step transforms a functional patch into a visually indistinguishable part of your decorative patio.
Concrete surface finishing techniques require precision and careful attention to detail. Your goal is to match the existing concrete’s texture and profile exactly, making the repair invisible to the naked eye.
Here are the essential techniques for smoothing and blending:
Select appropriate smoothing tools based on your concrete’s texture
Use light, consistent pressure when leveling the surface
Check surface alignment from multiple angles
Match surrounding concrete texture carefully
Clean excess material immediately during the process
Perfect surface blending requires patience and a keen eye for detail.
Surface finishing methods recommend using specialized techniques like sanding or grinding to achieve visual uniformity. Work methodically to ensure the repaired area seamlessly integrates with the surrounding decorative concrete.
Allow the surface to dry completely before making any final aesthetic adjustments. Take your time and focus on creating a professional-looking result.
Pro tip: Keep a spray bottle of water nearby to lightly mist the surface during smoothing, which helps prevent premature drying and allows for more precise blending.
Step 5: Check and Maintain the Repaired Area
Your concrete crack repair is complete, but the work doesn’t stop there. Ongoing maintenance ensures the longevity and appearance of your decorative patio’s newly repaired surface.
Concrete repair maintenance protocols recommend regular inspections to catch potential issues early. Think of this as your repair’s health check-up, designed to prevent future problems before they escalate.
Here are the key maintenance steps for your repaired area:
Inspect the repair quarterly for signs of new cracking
Clean the surface with a mild detergent and soft brush
Check for color or texture changes
Monitor surrounding concrete for related stress indicators
Reseal the area annually or as recommended by the repair material manufacturer
Consistent monitoring is the secret to long-lasting concrete repairs.
Concrete damage monitoring techniques emphasize early detection as the most critical aspect of maintenance. Look for subtle changes in the repair area that might indicate underlying issues.
Remember that environmental factors like temperature fluctuations, moisture, and ground movement can impact your repair over time. Stay proactive and attentive to ensure your patio remains beautiful and structurally sound.
Pro tip: Take a smartphone photo of the repair immediately after completion to create a baseline reference for future comparisons during your periodic inspections.
Here’s how common errors impact decorative concrete repairs:
Common Error | Negative Impact | Recommended Solution |
Insufficient cleaning | Weak filler bonding | Use quality brushes and vacuums |
Excessive crack widening | Noticeable repair, weakens patio | Use precise chisels and tools |
Poor filler choice | Cracking or mismatched color | Match filler to crack size and finish |
Inconsistent surface blending | Visible repair area | Carefully match texture and contour |
Skipped maintenance | Recurring cracks or stains | Inspect and clean area regularly |
Here’s a summary of concrete crack repair steps and their main objectives:
Repair Step | Main Objective | Key Professional Benefit |
Assess & Clean | Remove all debris, ensure clean surface | Promotes strong adhesion, prevents repair failure |
Prepare Crack | Modify geometry for optimal fill | Ensures durable, seamless patch |
Apply Filler | Fill crack thoroughly and smoothly | Restores structural integrity |
Smooth & Blend | Match surrounding texture | Hides repair visually |
Check & Maintain | Monitor for future issues | Extends repair lifespan, prevents further damage |
Restore Your Decorative Patio With Expert Concrete Repair Solutions
Cracked concrete in your decorative patio can be frustrating and damage the beauty and safety of your outdoor space. This article showed how precise assessment, cleaning, preparation, and smoothing are key to lasting crack repairs. If you want to avoid common pitfalls like poor filler bonding or visible patches, trust professionals who specialize in stamped and regular concrete repairs.

Take control of your patio’s restoration today with BNTS Construction’s expert masonry and concrete repair services. Our team ensures your decorative concrete repair blends flawlessly and lasts for years. Don’t wait for minor cracks to worsen. Visit our site now to explore how we can bring back the original charm and strength to your patio with customized solutions that include foundations, additions, and soon epoxy coatings.
Discover peace of mind and unmatched quality with our trusted services at BNTS Construction. Contact us today and make your concrete surfaces as decorative and durable as when they were first installed.
Frequently Asked Questions
How do I assess the cracks in my decorative patio before repairing them?
Start by visually inspecting each crack for its width, depth, and direction. Use a wire brush or stiff-bristled broom to clean the area and remove debris, ensuring a thorough evaluation of the damage.
What is the best way to prepare a crack for concrete repair?
Widen the crack into a V-shape to improve bonding with the repair material. Remove crumbling concrete around the edges and ensure all surfaces are clean and square, optimizing the area for a lasting fix.
How do I choose the right filler for my concrete cracks?
Select a concrete crack filler based on the specific characteristics of the crack, including its width and depth. Carefully mix the material according to the manufacturer’s instructions before application, ensuring a strong and durable repair.
What steps should I follow to ensure a smooth surface after repairing a concrete crack?
Use appropriate smoothing tools while applying light pressure to level the repair surface. Match the texture of the surrounding concrete closely, and clean any excess material immediately to achieve a seamless finish.
How can I maintain my repaired patio to avoid future cracks?
Inspect the repaired area at least quarterly for signs of new cracking and clean the surface regularly with a mild detergent. Reseal the area annually to help protect against environmental factors and extend the lifespan of your repairs.
Recommended
Comments